How to install Creative Profiles (Mac)
So you have a Mac, you use the latest version of Adobe Lightroom or Adobe Camera Raw (ACR), and you got your hands on some great Creative Profiles? Here’s how to install them!
Please note, the profiles you find on Contrastly are compatible with both Mac and Windows, and they require the latest version of Adobe Lightroom and/or Adobe Camera Raw.
Step 1: Move Files to The Correct Location
Once you have some creative profiles, it’s time to move them to the correct location on your Mac. The Profiles should be moved to the following location:
[User Name]/Library/Application Support/Adobe/Camera Raw/Settings
If the ~/Library folder doesn’t appear for you, you can make it visible or easily access it by following the steps in this help article from Adobe.
Simply select the folder(s) that contain the Creative Profiles and right right-click and select Copy, or hit command+C.
Then, in the Camera Raw/Settings folder, simply Paste the item(s) in there. This will effectively copy the Creative Profile folder(s) into the Camera Raw Settings folder so that both Lightroom and ACR can “see” the files.
Here’s how to do it:
Step 2: Update Lightroom / ACR
Now, it’s time to start playing around with your new Profiles. Once they’re moved into the Camera Raw Settings folder, they’ll be available in both Lightroom and Adobe Camera Raw (ACR).
But first, let’s make sure you have the latest version of Lightroom and ACR that includes the new Profile Browser. Open up your Creative Cloud Application Manager and simply update to the latest version.
Step 3: In Lightroom and ACR
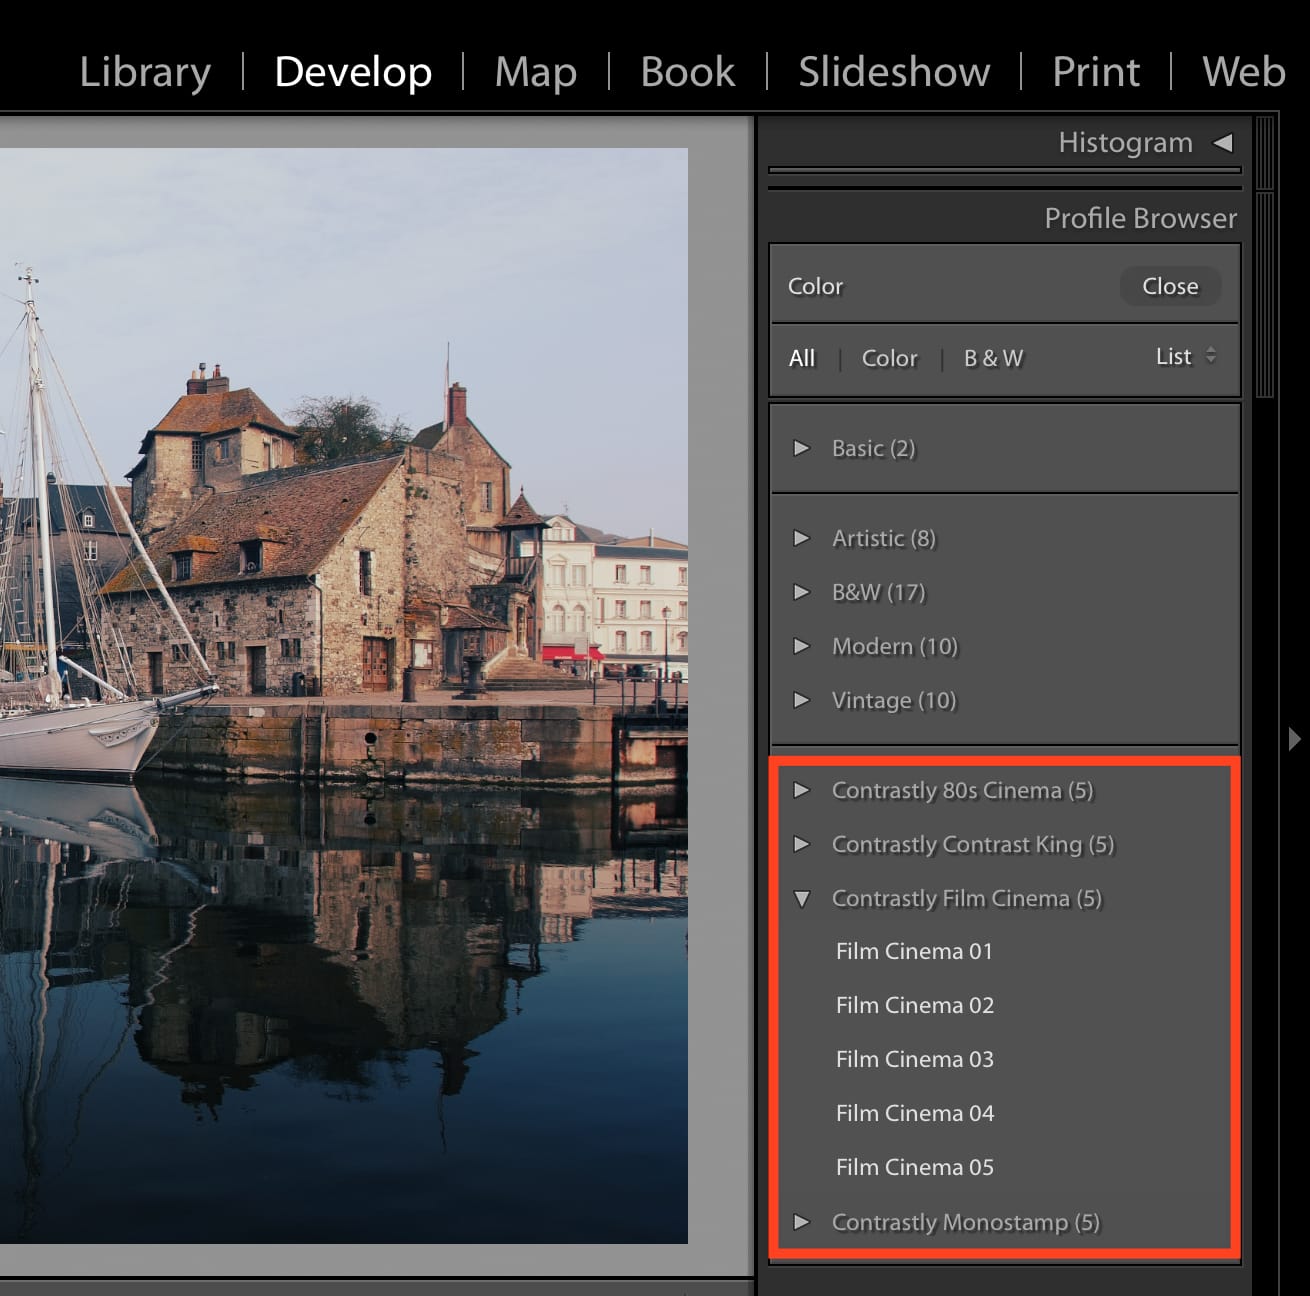
The Profile Browser is essentially the same in Lightroom and ACR. Let’s start with Lightroom. Open up the application then head over to the Develop module by clicking it in the top right navigation bar.
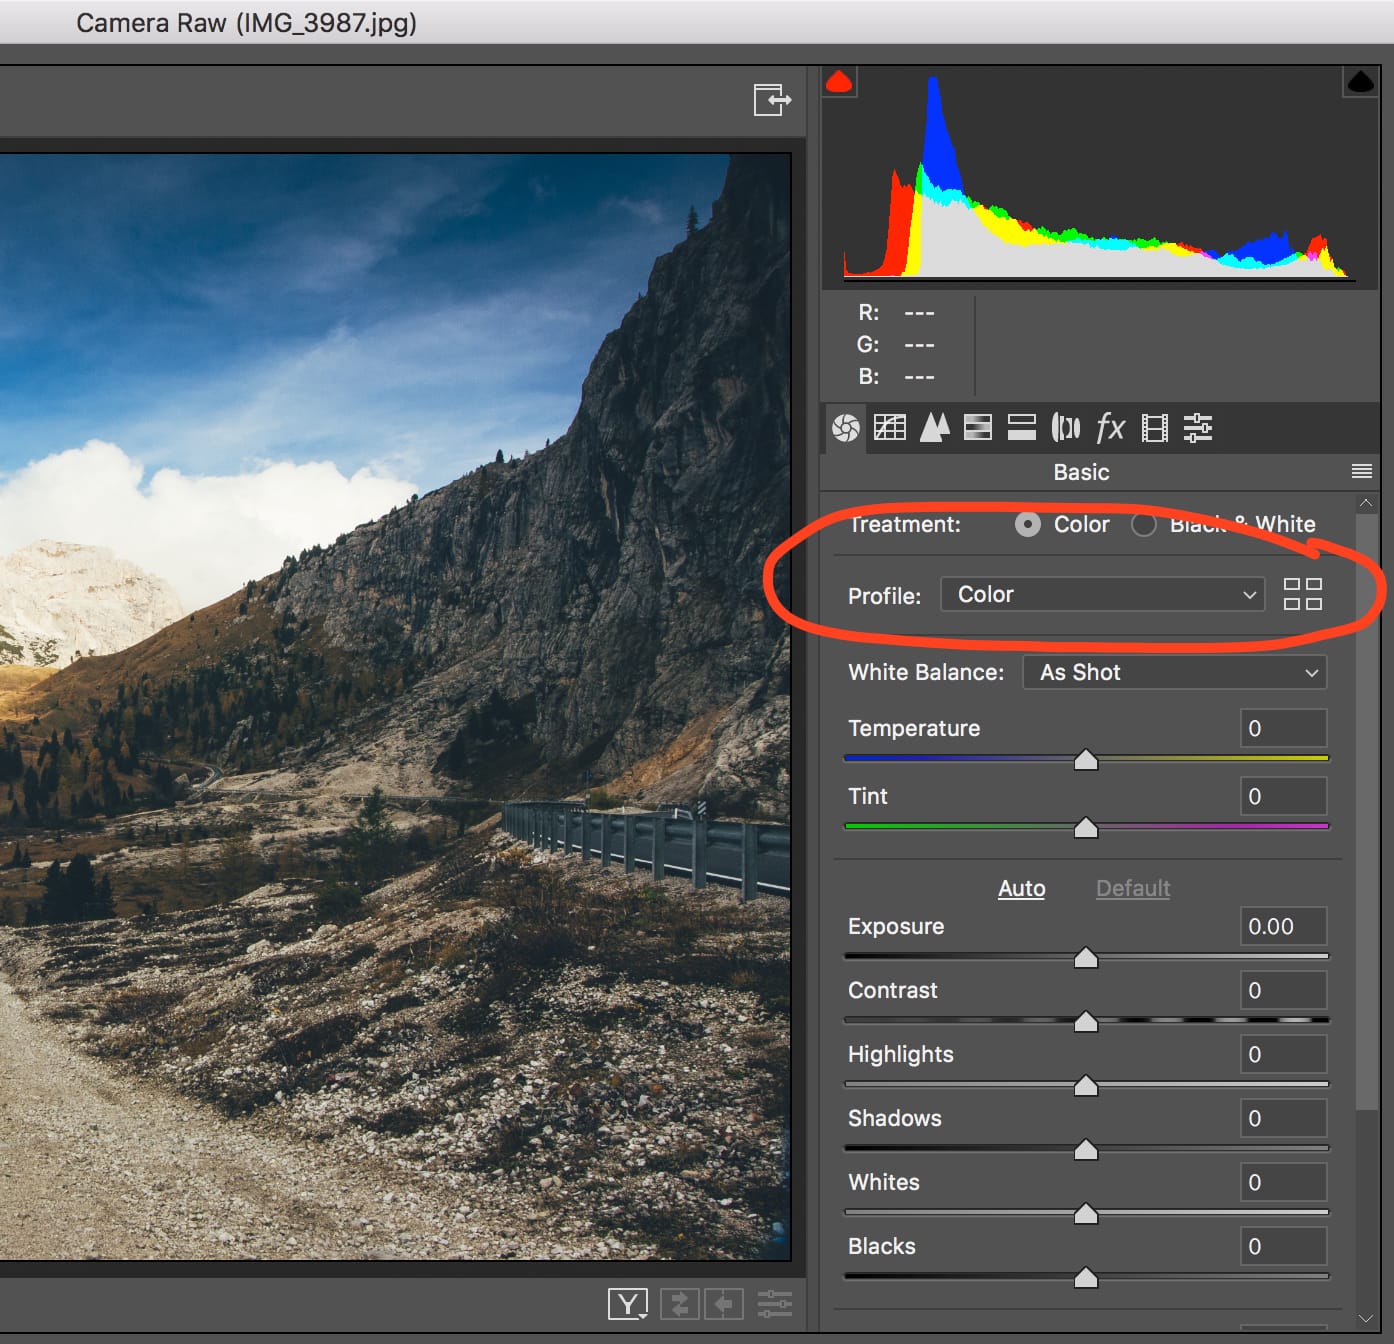
On the right rail you should see a few panels, like the Histogram, Basic, Tone Curve, etc… Open up the Basic panel if it’s not opened already. Inside the Basic panel at the top, you should see a Profile section. On the right there’s an icon that represents a grid (the 4 little squares icon). Click this icon to open up the Profile Browser.
Inside the Profile Browser you should see a few Profile sets. Some of them are the defaults provided by Adobe (Artistic, B&W, Modern, Vintage), and you should also see the new Contrastly Profiles you have installed. Click on the little arrow on the left of the name to expand the set and then you can start using your new profiles!

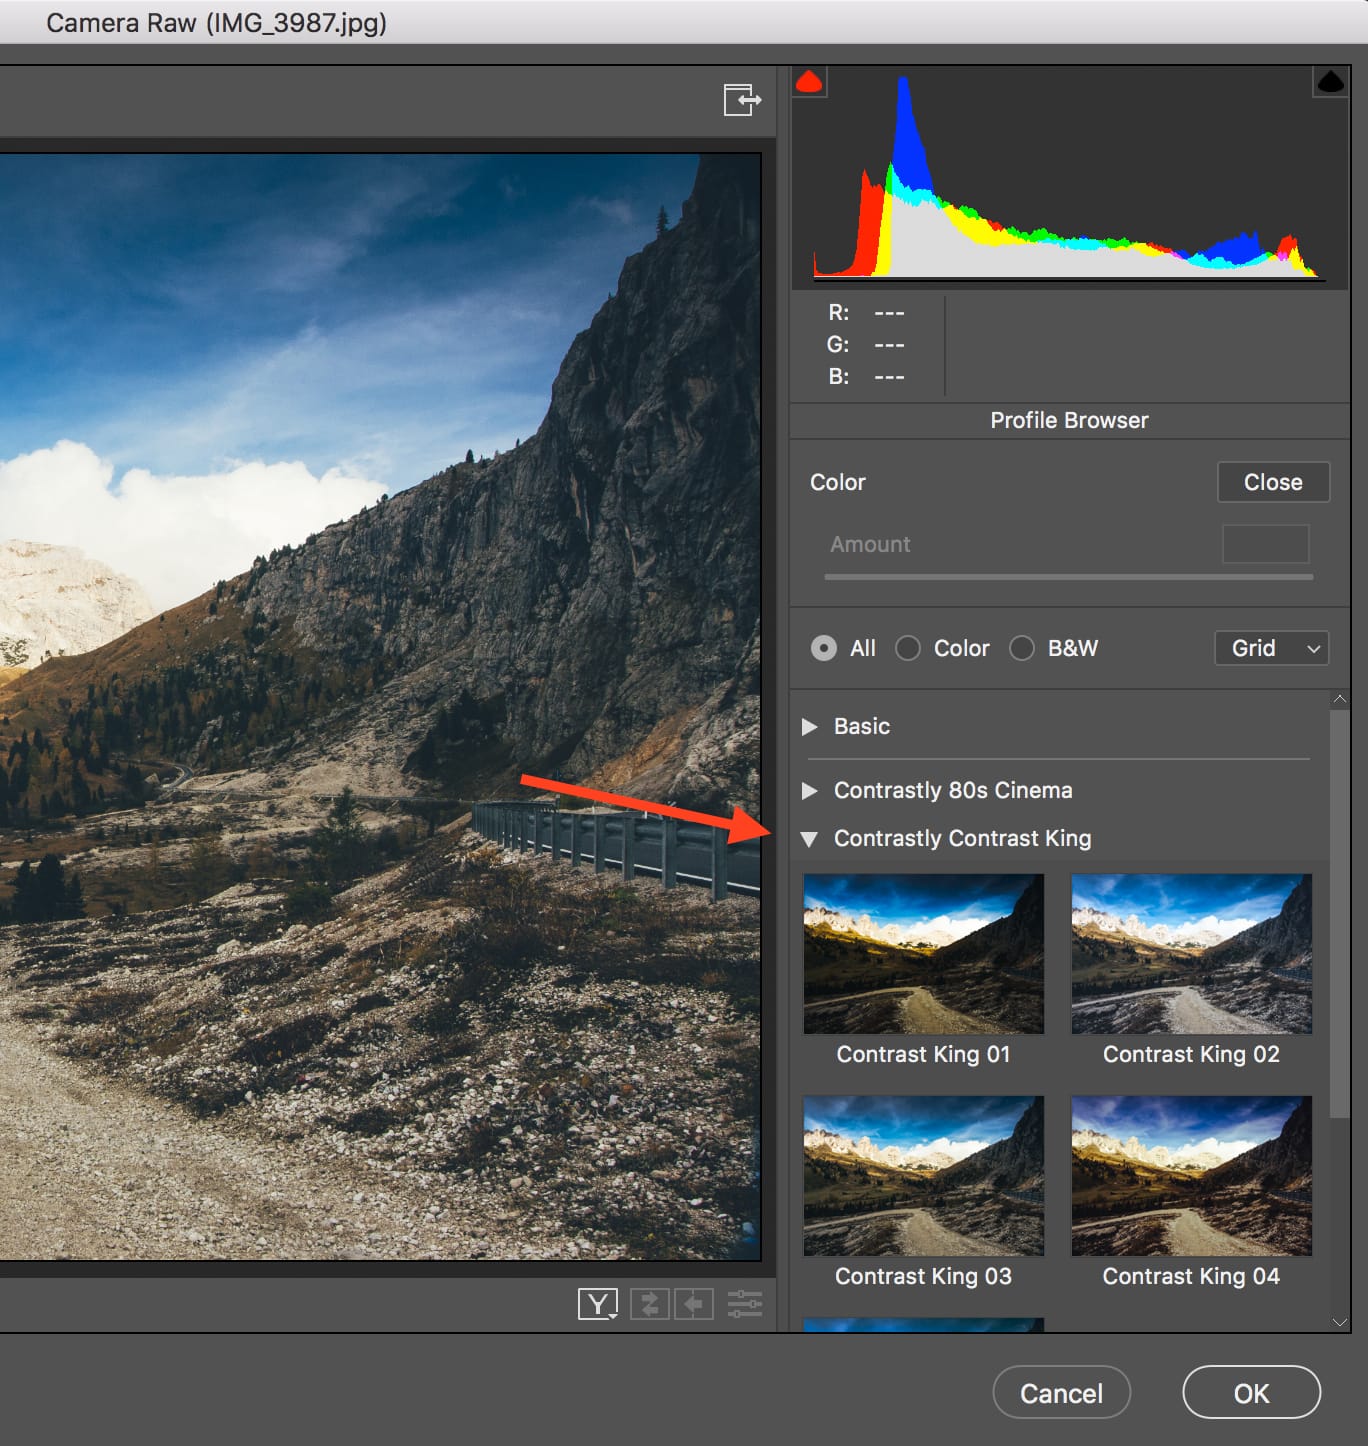
Once you apply a Profile, you can adjust its intensity using the Amount slider at the top.
In ACR the process is almost identical. If you’re accessing ACR via Photoshop, you’ll see a similar “Profiles” dropdown menu with a 4-squares/grid icon. Clicking on it opens up the Profile Browser and from there it works the same as in Lightroom.


Of course if you have any questions, please don’t hesitate to get in touch with us and we’ll be happy to help!